


I positively LOVE this look! Here's how I did it:
Step 1: I applied a small strip of scotch tape to the back of my hand and peeled it off. I then applied it diagonally right next to my eye. (pictured)


Step 2: I then applied the Elf Smudge Pot in Cruisin Chic to my entire eyelid and blended it upwards and outwards past my crease and onto the tape with my finger.


Step 3: I then aplpied the Elf Jumbo Eyeshadow Stick in Forest Nymph to the outer edhe of my eyelid. I blended it inwards using my finger.


Step 4: I then applied the shade Heist by Urban Decay into my crease as well as the outer edge of my eye and blended it upwards and outwards.


Step 5: I then applied the shade Freak by Urban Decay (Electric Palette) on the inner corner of my eyelid, stopping almost halfway across my lid.


Step 6: I then applied the shade Lounge by Urban Decay (A multi-chrome green/red/brown shade) to the outer edge of my lid all the way across my lids stopping at where it met Freak, and gently blended where the two met.


Step 7: I then applied the shade Perversion by Urban Decay (Matte dark blue/black) into the outer crease and blended it upwards and outwards for depth.


Step 8: I then applied the shade El Dorado by Urban Decay into the inner corner/tear duct area of my lids to help make my eye color "pop" a bit.


Step 9: I then picked up my Sleek Cosmetics palette in Au Naturale and used the lightest matte shade in the palette for my brow are to highlight the look.


Step 10: I then applied the same Elf Jumbo Eyeshadow Stick as before directly under my lower lash line starting from the outer edge of my eye towards the inner corner of my eye...but I stopped about a third of the way. I then used a smudging brush to blend it a bit and soften the line.


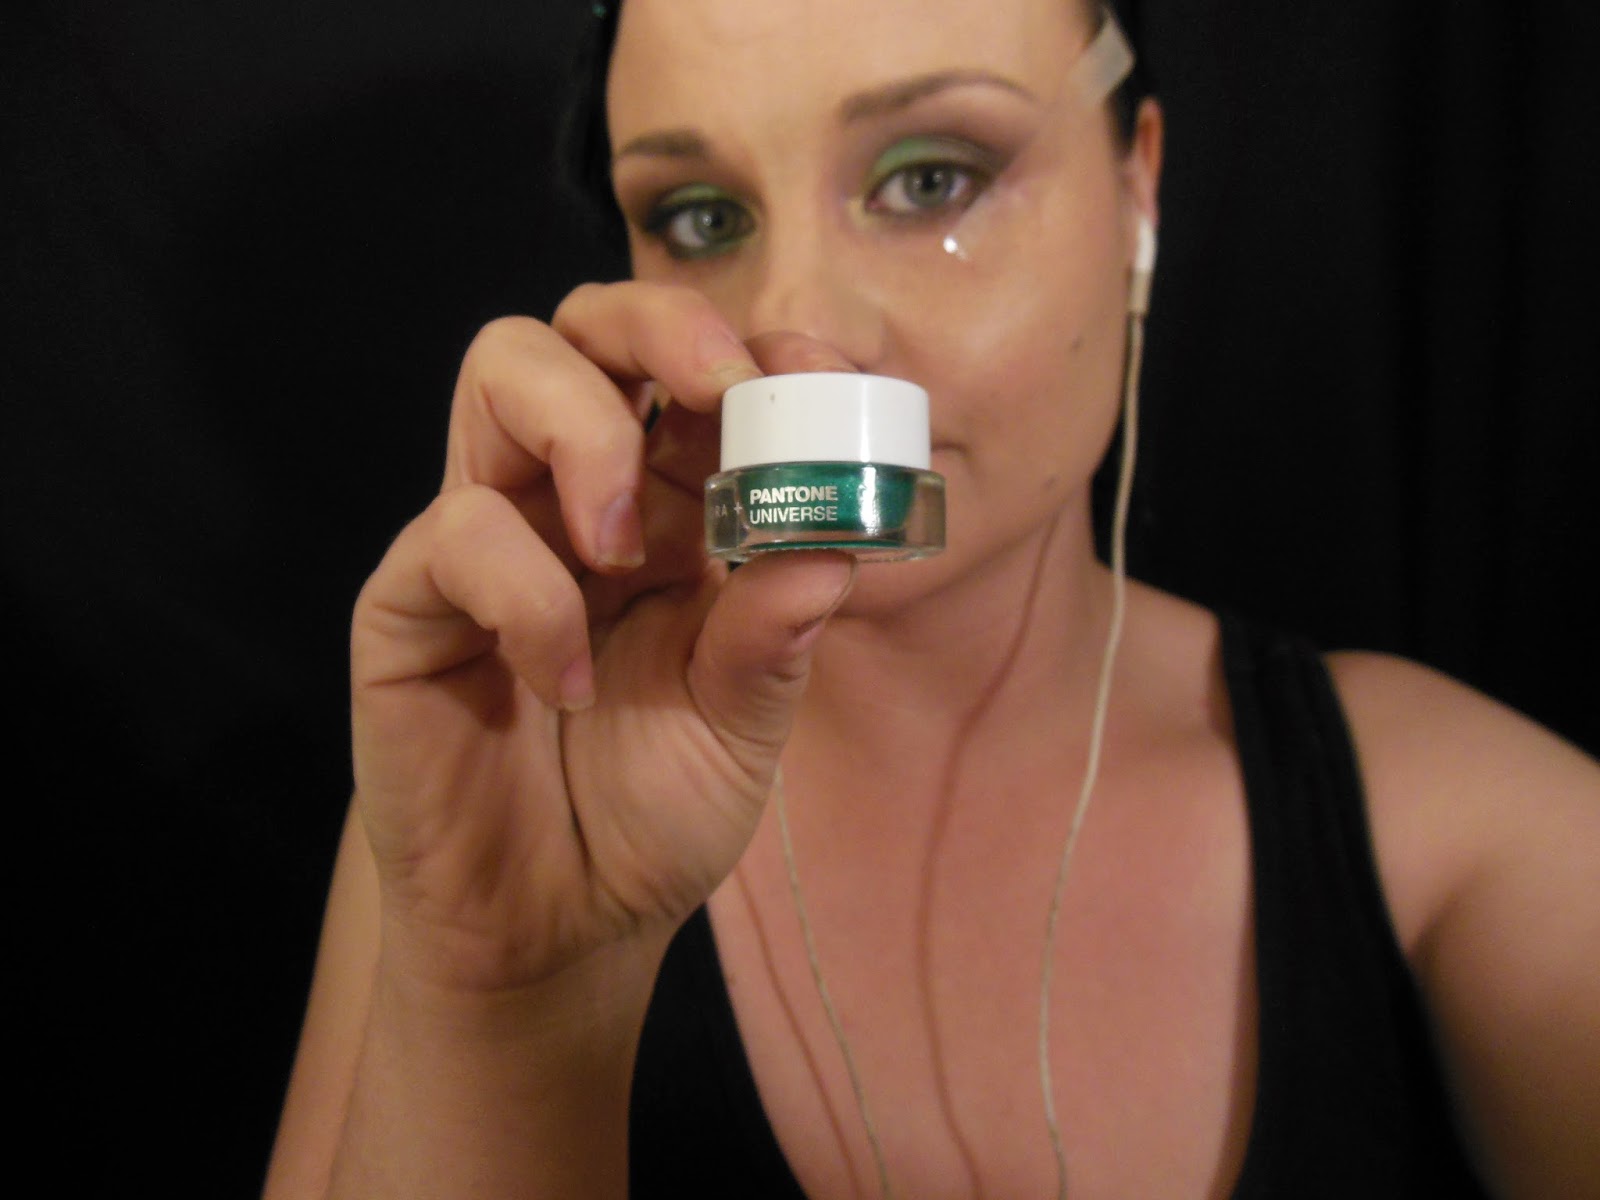
Step 11: I then applied the Sephora + Pantone Lid Eyeshadow/Liner lid stain in Emerald right next to the green jumbo stick underneath my lower lash line, and brought the bright shade inwards towards the inner tear-duct area.

Step 12: I then used a generic black gel liner to create a cat eye along the tape next to my eye. It doesn't matter how much eye makeup you get on the tape. The idea of the tape is to make clean up super easy for us as well as give us a nice clean line!


Step 12: Gently peel off the tape!


Step 13: Next I went ahead and lined my waterline. This liner is the Too Faced Perfect Black Eyeliner.


Step 14: I then applied a coat of mascara. this one is the Elf Mineral Infused Mascara.


Step 15: I then applied a Baked Bronzer into the hollows of my cheeks for a slight contour. This one is the Elf Baked Bronzer in Maui.


Step 16: I then applied a nice warm mauve/berry blush to the outer half of my cheeks, starting from my hairline. This one is Sin by Nars.


Step 17: I then used a light deflecting powder to highlight my face. This one is the Hourglass Ambient Lighting Powder in Luminous Light.


Step 18: I then chose to keep the lips super simple: I just applied a bit of MAC Cosmetic's lipstick in High Tea.


Finished Look!


Comments
Post a Comment